
Sim Racing Ergonomics: The Definitive Seating Position Guide
You can install the most advanced pneumatic sim racing pedals on the planet — but if your biomechanics are compromised, your lap times will be too. In professional motorsport, speed is a byproduct of stability, comfort and muscle isolation. This is the complete engineering protocol we use to equip Le Mans winners and Formula 1 drivers who train with SRP.
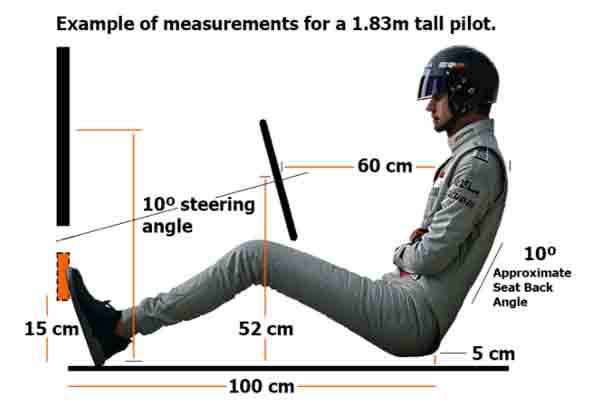
/// SECTION_01 // BIOMECHANICS
The Golden Rules of Driving Position
Mastering your sim racing seating position is as critical as dialing in your field of view. The most common amateur mistake is mounting the seat too close to the pedal deck: with the leg bent near 90°, applying threshold braking pressure pushes your lower back into the seat instead of isolating force through the large leg muscles.
The 120° Knee Rule
When you press the brake to absolute maximum (100% load), your knee must keep a bend of 120° to 130° — with an accepted tolerance window of 120°–135°. This geometry forces the ankle and calf to act as the primary pivot for fine modulation, the foundation of consistent trail braking. Above 140° you lose power and pedal feel; below 110° your quadriceps burn out within a single stint.
The Full-Brake Test
The universal functional test: press the brake to 100% without your hips lifting off the seat and without your lower back losing contact with the backrest. If you push yourself backwards, the seat is too far away or the pedals are mounted too high. This test is non-negotiable with 80kg+ load cells — and absolutely mandatory with a pneumatic brake that accepts up to 160kg.
The Heel as Pivot
Your heel is the fixed reference point of the entire kinematic chain. A floating heel forces the brain to compute balance instead of pressure. Anchor the heel, pivot the foot over it, and brake with the ball of the foot using your thigh muscles — never by flexing the ankle against a hard brake.
/// FIG 1.0 // BIOMECHANICAL ALIGNMENT — KNEE @ 100% BRAKE
| Checkpoint | Target | Failure Signal |
|---|---|---|
| Knee @ 100% brake | 120–130° (max 135°) | <110° = quad burn · >140° = no feel |
| Knee @ full throttle | ≥ 90° | Below 90° = seat too close |
| Hips during braking | ANCHORED | Lifting off seat = pedals too far/high |
| Lower back | FULL CONTACT | Gap vs backrest = lumbar overload |
| Heel | PLANTED | Floating heel = inconsistent pressure |
/// PRO INSIGHT
"The brake pedal is your reference point, not the throttle. Set your seat distance for maximum brake pressure first — everything else in the cockpit is tuned around that single measurement."
/// SECTION_02 // SEATING GEOMETRY
GT vs Formula: Two Different Machines
A Formula seating position — feet elevated near chest level, pelvis tilted back — demands a completely different pedal deck angle, wheel height and heel support than an upright GT or rally cockpit. Neither is "better": they are different tools. A GT position is the correct baseline for most drivers and for long endurance stints; a Formula position unlocks authentic open-wheel leverage but punishes a weak core and flattens the lumbar curve if you jump into it too aggressively. If you race multiple disciplines, choose a neutral GT position and migrate in small increments.
| Parameter | GT / Endurance / Rally | Formula / Prototype |
|---|---|---|
| Backrest angle | 100–110° from seat base (20–30° from vertical) | 40–60° reclined from vertical |
| Pedal deck height | At or below seat level | Above seat level — feet near chest line |
| Knee angle (unloaded) | 120–135° | ~150°+, knees above hip line |
| Heel rest angle | 70° | 90° |
| Wheel position | Chest height, elbows 90–120° | Higher and closer, elbows 60–75° ("holding a bowl"), looking over the rim |
| Best for | GT3, rally, drift, endurance, long sessions, beginners | F1, F2, prototypes, high-downforce sprint racing |
| Main risk | Over-upright backrest → lumbar compression | Excessive recline → flattened lumbar curve, hip-flexor strain |
/// DATA: CONSENSUS FROM VRS, ASETEK, MYSIMRIG & SRP ENGINEERING PROTOCOLS
Whatever the discipline, a slight 5–15° upward tilt of the seat base helps you sit "inside" the chassis and keeps the pelvis stable under braking. And if you also drive a real car, measure its comfortable hip height and shoulder-to-wheel distance and replicate them on the rig — your muscle memory already knows that geometry.
/// SECTION_03 // DISTANCES & GEOMETRY
Wheel, Monitor & Pedal Deck Distances
Steering wheel: the wrist rule
Shoulders flat against the backrest, arms fully extended forward: your wrists must rest on top of the wheel rim. That is your distance. Now grip the wheel at 9 and 3 — your elbows should hold 90°–120° of bend (60–75° in a Formula position). Wheel height: chest to shoulder level, never above the shoulders, never blocking the screen, wrists neutral. Functional test: rotate the wheel 90° without your shoulders peeling off the backrest. If they do, the wheel is too far.
Monitor: distance, height and FOV
Sit 60–70 cm from the screen — roughly one arm's length — with the center of the panel at eye level (your natural gaze should land on the upper third). FOV is calculated, never guessed: measure eye-to-screen distance with a tape (±1 cm; a 5 cm error visibly distorts the image), then compute it. Reference: a 27" monitor at 60 cm yields roughly 55–60° horizontal FOV. Use our SRP FOV Calculator or the independent simracingcockpit.gg FOV calculator — and always set the seating position before touching the FOV value. On triple screens, angle the side panels ~60° inward and keep all three panels at equal distance.
Pedal deck: height, angle, spacing
In a GT/rally position the pedals sit at or below seat level; in a reclined Formula or modern GT position the deck rises above the seat for extra braking leverage. Too low wastes force through the thigh; too high loads the knees and hip flexors. The sweet spot: full brake pressure without pushing yourself out of the seat. Start with the brake face at 15–30° from the floor, run the throttle slightly flatter to protect the ankle on long stints, and keep brake and throttle laterally close for fast foot transitions. A slight downward tilt of the heel plate stops the foot sliding forward.
/// PRO INSIGHT
"Adjust in this order, always: seat → pedals → wheel → monitor. Change one variable at a time and validate with 30–45 minute stints. Ergonomics is iterative engineering, not guesswork."
/// SECTION_04 // ANCHORING THE KINETIC PIVOT
Heel Anchoring & Heel-and-Toe
A floating heel is the number-one enemy of consistent throttle application. When the heel is planted, the central nervous system can dedicate 100% of its bandwidth to pressure modulation instead of balance. The SRP® Adjustable Heel Rest solves this with 5-axis CNC-machined AL6061 aluminum:
- Dual inclinations: 70° optimized for upright GT racing, 90° for Formula sim rigs.
- Precision adjustment: fine-tune height and distance to match your racing shoe geometry.
- Total stability: eliminates microscopic foot slippage during aggressive trail braking and downshifts.
Heel-and-toe requirements
Classic heel-and-toe needs brake and throttle laterally close, the ball of the right foot on the brake and the heel — or the outer edge of the foot — blipping the throttle without lifting. A planted heel on the deck is the classic configuration that makes this repeatable.
Inverted vs floor-mounted pedals
If you primarily simulate rally stages, drift or classic manual road cars, inverting the pedals changes the pivot arc and drastically reduces ankle strain during repetitive heel-and-toe. The SRP® Inverted Pedals Kit offers 11 mounting configurations to replicate iconic cockpit layouts. For high-downforce GT3 and Formula competition, however, we recommend standard floor mounting: it delivers the most rigid response under extreme 100kg+ braking forces. Community feedback mirrors this — drivers who inverted their SRP pedals for classic cars report improved braking and reduced knee pain, while competitive GT3 drivers stay floor-mounted for maximum stiffness.
Calibration tip: set small deadzones in SRP MySETUP so you can rest your feet on the pedals without registering input — essential for relaxed endurance stints.
/// SECTION_05 // HARDWARE DATABASE
Cockpits & Seats: The Rigidity Database
Ergonomics collapses without a rigid chassis. When you stand on a pneumatic brake at 100kg+, the seat pushes against the pedal deck through your body — any flex in between converts force into movement instead of telemetry. This is the market landscape for cockpits that can genuinely hold 80kg+ brakes, and the seats that keep your pelvis locked while you do it.
Cockpits / chassis
| Cockpit | Strength | Rigidity for 80kg+ / pneumatic brakes |
|---|---|---|
| Sim-Lab P1X Pro | The 8020 reference: 160×40 base profile, huge ecosystem, used by Team Redline | ★★★★★ Proven with 30Nm+ DD wheels and 150kg+ brakes, no appreciable flex |
| Sim-Lab GT1 Evo | GT-position sibling of the P1X; best high-end rig per euro | ★★★★½ 40×80 profile, handles ~25Nm and ~80kg load cells |
| Trak Racer TR160 | "The tank": 160×40 profile, official partner of Alpine F1 / Aston Martin / Porsche | ★★★★★ Same stiffness class as the P1X Pro |
| Trak Racer TR80 / TR8 Pro | Best value; pedal plate rated to 180kg; 30–60 min assembly | ★★★★ Enough for high-end load cells and most hydraulics |
| Next Level Racing F-GT Elite 160 | True Formula/GT/Hybrid multi-position; FEA-validated pedal deck; 60kg chassis | ★★★★★ Rated for hydraulic and active pedals without flex |
| Advanced SimRacing ASR 4 / Pro | Over-engineered North American option, 120/160mm profiles, top-tier gussets | ★★★★★ Built for hydraulics and active pedals |
| GT Omega PRIME | 160×40 profile, 45kg, pre-drilled for major wheel/pedal brands | ★★★★½ Very rigid, a step below the P1X in comparatives |
| Playseat Challenge / Formula Instinct | Foldable entry point; Formula Instinct is a dedicated open-wheel layout | ★★–★★★ Challenge unsuitable for hard brakes; Instinct handles DD wheels |
/// SOURCES: SIMRACINGCOCKPIT.GG · SIMRACINGSETUP.COM · NLR FEA DATA
Seats
| Seat | Type | Strength |
|---|---|---|
| Sim-Lab Speed1 | Fixed bucket, fiberglass + memory foam | Natural match for profile rigs; deep lumbar support |
| Sim-Lab Speed3 | Fixed bucket, FIA look, high-density foam | The most comfortable "budget-premium" bucket; 5-point harness slots |
| Sparco Grid-Q | FIA motorsport bucket | Maximum lateral hold and immersion; requires side mounts |
| OMP TRS-E / Champ | Motorsport bucket | Best value FIA-style fiberglass construction |
| Recaro (bucket / recliner) | Bucket or reclining | Long-stint comfort and support focus |
| NLR ES1 / ERS / PRS series | Fixed buckets & reclining semi-buckets | PRS adds adjustable lumbar support — key for endurance |
/// PRO INSIGHT
"With very hard brakes — 80kg+ load cells, hydraulics, or a 160kg-capable pneumatic system — a one-piece fixed bucket eliminates the play of any reclining mechanism, so more of your force reaches the pedal instead of moving the seat. Recliners are fine below ~60kg brake force; beyond that, go bucket."
/// SECTION_06 // FAILURE ANALYSIS
Common Posture Errors → Fixes
These are the pain patterns the sim racing community reports most — lower back, shoulders, numb feet — each with its root cause and the engineering fix. Treat pain as telemetry: it is your body reporting a geometry error.
| Symptom | Likely Cause | Fix |
|---|---|---|
| Lower back pain | Backrest too vertical; pedals too far (hip pulls forward under braking); flat seat rotating the pelvis; reclining too far "because it looks racey" | Set backrest 100–110°, bring pedals closer until hips stay planted at 100% brake, add lumbar support, tilt seat base 5–15° |
| Shoulder / neck fatigue | Wheel too far or too high; monitor too high; "hanging" off the wheel from a low or over-reclined seat | Apply the wrist rule, drop the wheel to chest height, center the screen at eye level, raise the seat |
| Numb feet / pedal cramps | Pedal face angle wrong; no heel support | Plant the heel (70° GT / 90° Formula heel rest), open the throttle face angle, calibrate rest deadzones |
| Ankle pain when braking | Braking by flexing the ankle against a hard load cell / pneumatic brake | Brake with the full leg — thigh muscles, stiff ankle, ball of the foot on the pedal |
| Stiff neck | Screen too low, or the wheel blocking the view forcing you to look up | Raise the screen center to eye level; reposition the wheel below your sight line |
| Hips lifting under braking | Pedals too far away or angled too flat; lumbar twist | Bring the pedal deck closer and/or more vertical until 100% pressure keeps you fully in the seat |
| Tingling fingers | Wheel too far or too low — compressed wrist nerves | Close the wheel in, neutral wrists, grip at 9 and 3 with 90–120° elbow bend |
/// SOURCES: COMMUNITY REPORTS (R/SIMRACING · OVERTAKE.GG · AC FORUMS) + SRP SETUP PROTOCOLS
Two habits separate consistent drivers from the rest. First, brake harder, not lighter: a firmer brake builds cleaner muscle memory — raise pressure a few percent per week rather than starting soft. Second, one change at a time: adjust a single variable, validate over a 30–45 minute stint, then move to the next. Chasing five adjustments at once is how rigs never get dialed in. For a deeper methodology, the Virtual Racing School ergonomics lesson and the Asetek SimSports setup guides align closely with this protocol.
/// SECTION_07 // STRUCTURAL INTEGRITY
Rigidity, Baseplates & 16-bit Telemetry
Rigidity is the foundation of telemetry. When you load an SRP® pneumatic brake, any microscopic flex in an aluminum-profile rig registers as "mushy", inconsistent feedback — ironically mimicking the thermal fade of inferior rubber load cell pedals and destroying muscle memory. With a brake system that accepts up to 160kg of pressure, structural stiffness is not an upgrade path; it is a prerequisite.
The 16-bit transducer advantage
A dedicated SRP® Baseplate anchors your pedals into a single, unified monocoque block of CNC-machined aluminum. That structural integrity guarantees that 100% of your physical effort is captured strictly by our 16-bit industrial ceramic pressure transducers — 65,536 resolution steps at 1000Hz — delivering pure, unadulterated braking telemetry to the simulator. Nothing lost to flex, nothing lost to latency, nothing lost to heat.
/// PRO INSIGHT
"Any structural flex in your rig translates directly into lost kinetic energy and inconsistent lap data. Unify the pedal block first — then trust the telemetry."
/// SECTION_08 // SETUP PROTOCOL
How to Sit Correctly: The 6-Step Protocol
The exact sequence our engineers follow when equipping professional drivers. Respect the order — each step depends on the previous one.
- Set the seat first. Upright GT baseline: backrest 100–110° from the seat base, seat base tilted up 5–15°, sit bones anchored deep into the bucket with full lumbar contact.
- Position the pedals. Slide the seat/pedal deck until 100% brake pressure holds a 120–130° knee bend without your hips lifting or your lower back leaving the backrest. Verify full throttle keeps the knee above 90°.
- Anchor your heels. Install the heel rest at 70° (GT) or 90° (Formula), adjusted to your shoe. The heel is now the fixed pivot; the ankle modulates, the thigh delivers force.
- Set the wheel. Shoulders against the backrest, arms extended: wrists rest on the rim. Gripping at 9 and 3, elbows hold 90–120°. Wheel at chest height, never above the shoulders, never blocking the screen.
- Set the monitor. 60–70 cm from your eyes, panel center at eye level. Measure the distance with a tape — do not estimate it.
- Lock in FOV and validate. Compute FOV from the measured distance with the SRP FOV Calculator, then validate the full setup with a 30–45 minute stint. Change one variable at a time.
/// SECTION_09 // PADDOCK FAQ
Frequently Asked Questions
At 100% brake pressure your knee should hold a bend of 120°–130° (tolerance up to 135°). This lets the ankle act as the fine-modulation pivot while the large thigh muscles deliver force — without pushing your lower back off the seat. It is the foundation of consistent trail braking.
Use the wrist rule: shoulders flat against the backrest, arms fully extended — your wrists should rest on top of the wheel rim. Gripping at 9 and 3, your elbows should bend 90°–120° (60–75° in a Formula position), with the wheel at chest height and never above your shoulders.
Yes. A planted heel is the fixed pivot of the entire pedal kinematic chain — a floating heel forces your brain to manage balance instead of pressure. An adjustable heel rest (70° for GT, 90° for Formula) locks that reference point and eliminates microscopic foot slippage.
For GT, rally and endurance: 100–110° measured from the seat base (20–30° from vertical). For Formula and prototypes: reclined 40–60° from vertical with elevated pedals. Build a solid GT position first and migrate toward Formula in small increments to protect the lumbar curve.
Approximately 60–70 cm — about one arm's length — with the center of the screen at eye level. Measure the distance with a tape, then calculate your FOV (a 27" panel at 60 cm ≈ 55–60° horizontal FOV). Always fix the seating position before setting FOV.
The usual culprits: pedals too far away (your hip pulls forward under braking), a backrest too vertical, a flat seat without lumbar support that rotates the pelvis, or excessive recline that flattens the lumbar curve. Reset the seat to 100–110°, bring the pedals in until the full-brake test passes, and add lumbar support.
Inverted pedals replicate the pivot arc of street, rally and drift cars, reducing ankle strain during repetitive heel-and-toe downshifting. However, for maximum rigidity in high-downforce GT3 and Formula racing, a standard floor-mounted configuration is strongly recommended to handle extreme braking forces.
Rig flex occurs when the aluminum profile or pedal deck cannot absorb the pressure of load cell or pneumatic pedals. A dedicated solid aluminum baseplate unifies the pedals into a single block, eliminating flex and ensuring 100% of your effort is read by the sensors instead of bending the chassis.
/// SECTION_10 // CONFIGURE YOUR SETUP
Engineered Ergonomics. Zero Compromise.
Complete your cockpit with aerospace-grade hardware — the same technology Le Mans winners and Formula 1 drivers train with.

SYS.PROFESSIONAL // ENDURANCE MASTER
SRP® GT-R
The professional baseline. High-pressure pneumatic braking with zero thermal fade — demanding the exact ergonomics this guide teaches.
Configure GT-R →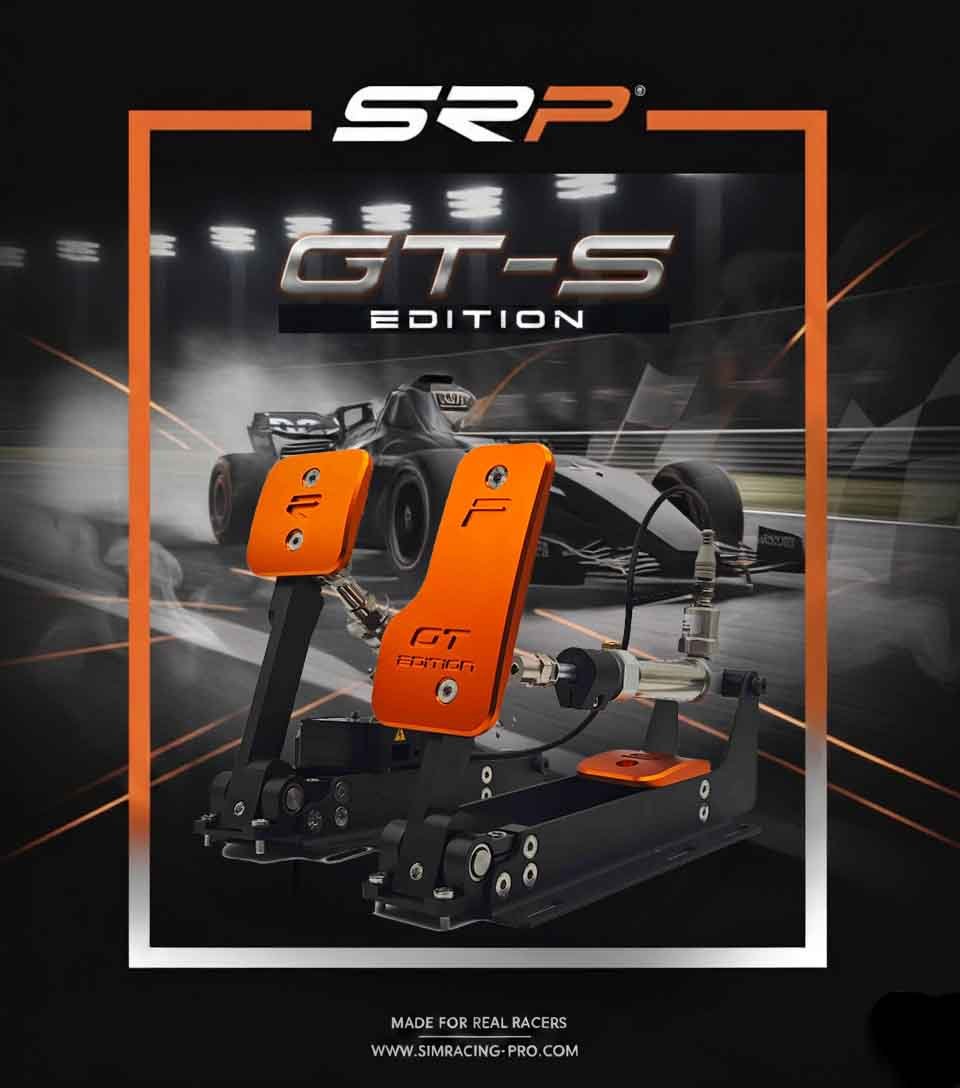
SYS.ENTRY_LEVEL // GT3 & RALLY
SRP® GT-S
GT3 & rally precision. Pneumatic linearity and adjustable travel to master every apex — the perfect entry into zero-latency air braking.
Configure GT-S →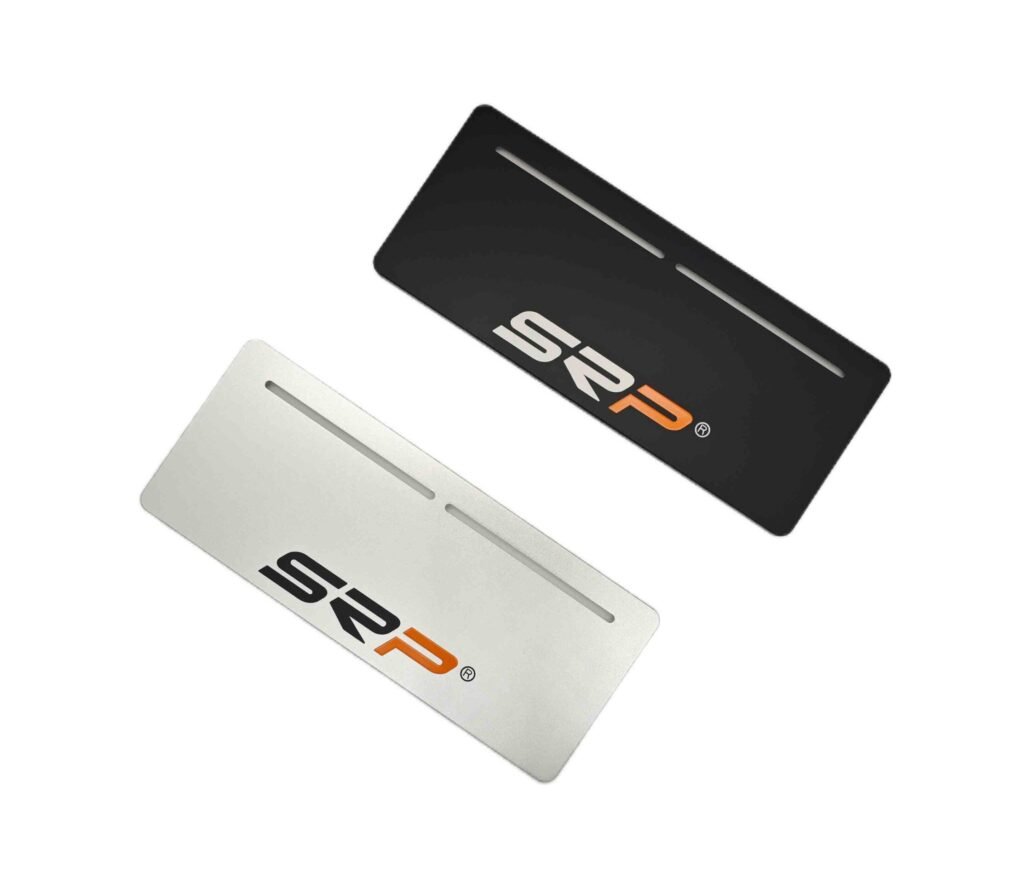
SYS.UPGRADES // ERGONOMICS LAB
SRP® Upgrades
Adjustable Heel Rests, solid Baseplates and Inverted Kits — engineering the perfect link between your biomechanics and the virtual chassis.
Explore Upgrades →